Row
Overview
A row in RollupCalc is similar to a row in a spreadsheet application where the row represents one or more horizontal cells. Unlike a spreadsheet application, a row in RollupCalc can be nested inside of another row allowing lower-level row quantities and amounts to "rollup" to it's parent rows.
This rollup feature provides a level of summarization beyond a traditional spreadsheet. By utilizing nested data, real-world scenarios can be modeled in RollupCalc.
Examples of real-world scenarios are:
- A project structure (work breakdown structure) that has high-level tasks with each high-level tasks having their own subtasks and those subtasks having their own subtasks.
- An organization with top-level business groups that are made up of lower-level departments with each department having multiple teams.
- A proposal that involves multiple scopes of work each being managed by different proposal managers.
Complex structures like this show up everywhere and, before RollupCalc, were difficult to model and manage.
Creating a row
To create a new row, follow these steps:
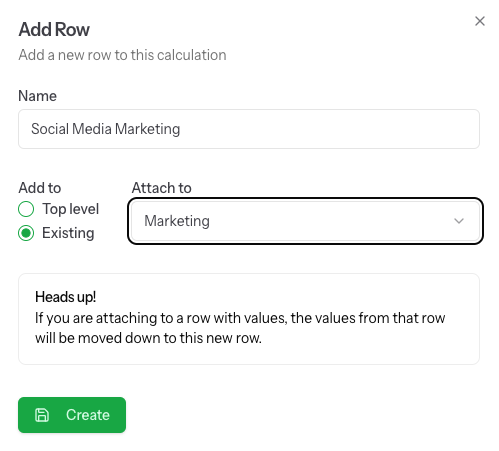
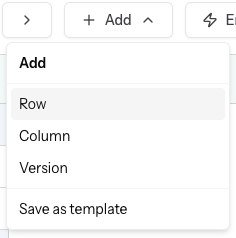
Step 1: Choose Add -> Row
On the toolbar, select Add, and from the Add menu, choose Row.
Name: Add a unique name for the row. This name servers as the row header. This field is required.
Add to: Choose if the row is a top level row or if it should be added (appended) to an existing row. Choose this option if the row being created should be nested under an existing row. If "Existing" is selected, the row that this row should be added to must be selected from the dropdown list of existing rows.